Bathymetric data can be organized and managed in many different ways. For example, you can have a hard drive full of rasters generated from recent survey data or have a remote server that stores all of your bathymetric data for a specific geographic region.
ArcGIS for Maritime:Bathymetry allows you to use descriptive metadata to better organize your bathymetric data holdings through the Collection feature. A collection consists of a name along with additional metadata fields that fully describe what the Collection feature is organizing for you. For example, if you have a large number of raster datasets for New York harbor and you also know who created the data and when, you can create a new collection called New York Harbor and either use the default metadata fields that are provided with the Bathymetry Solution or configure your own collection metadata fields to store the information for who created the datasets and the date when they were created.
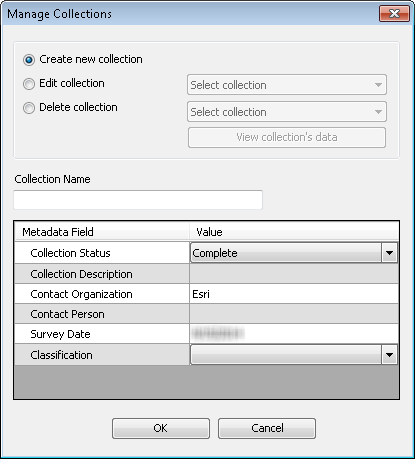
Each Collection feature you create is stored within the BIS geodatabase and can be applied to bathymetric data you manage through the Collection Manager dialog box. From the Manage Collections dialog box, you can decide whether to create a new collection, edit an existing collection, or delete an existing collection. If you choose to create a new collection or to edit an existing collection, the Collection Name section and the Metadata section of the dialog box become editable. Any collection within the active Bathymetry Information System (BIS) geodatabase can be edited.
- Start ArcMap.
- On the main menu, click Customize > Toolbars > Bathymetry.
-
Click the Manage Collections button
 on the Bathymetry toolbar.
The Manage Collections dialog box appears.
- Leave the Create new collection option selected.

- Type a name for the collection in the Collection Name text box.
- Click the Value cell next to Collection Status, click the drop-down arrow that appears, then choose the collection status.
- Planning
- In Progress
- Complete
- Optionally click the Value cell next to Collection Description and type a description.
- Click the Value cell next to Contact Organization and type the name of the contact organization for the collection.
- Click the Value cell next to Contact Person and type the name of the contact person for the collection.
- Click the Value cell next to Survey Date.
The field is automatically populated with the current date.
- If necessary, click the calendar drop-down arrow to choose a new collection date from the calendar.
- Click the Value cell next to Classification, click the drop-down arrow, then choose a classification for the collection.
- Public
- Confidential
- Secret
- 单击确定。
- Click OK to close the message.