ArcGIS for Desktop

  • Documentation
  • Pricing
  • Support

  • My Profile
  • Help
  • Sign Out
ArcGIS for Desktop

ArcGIS Online

The mapping platform for your organization

ArcGIS for Desktop

A complete professional GIS

ArcGIS for Server

GIS in your enterprise

ArcGIS for Developers

Tools to build location-aware apps

ArcGIS Solutions

Free template maps and apps for your industry

ArcGIS Marketplace

Get apps and data for your organization

  • Documentation
  • Pricing
  • Support
Esri
  • Sign In
user
  • My Profile
  • Sign Out

Help

  • Home
  • Get Started
  • Map
  • Analyze
  • Manage Data
  • Tools
  • More...

Creating a new docking setting

The Docking Manager helps you organize toolbars for specific processes as well as create your own settings that focus on specific tasks. For example, you can add and remove toolbars or windows from the Editing setting. Toolbars and windows can be adjusted so they dock anywhere within ArcMap, and a hierarchy can also be created to determine the order in which the toolbars appear.

A number of standard docking settings are released with Production Mapping and solutions. You can also create your own custom settings. Docking settings can be distributed to others using the Import and Export commands on the Docking Manager dialog box.

  1. Start ArcMap.
  2. On the main menu, click Customize > Production Mapping > Toolbar Settings > Docking Manager.

    The Docking Manager dialog box appears.
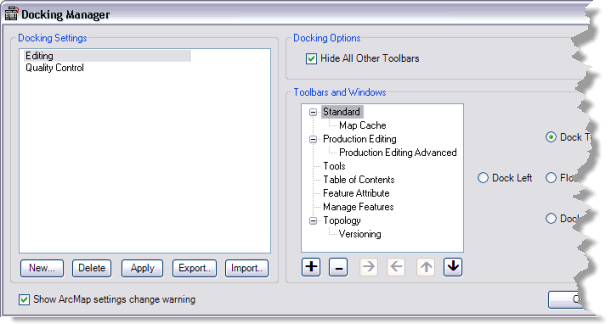
    Docking Manager dialog box
  3. Click New.

    The Add new docking setting dialog box appears.
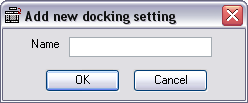
    Add new docking setting dialog box
  4. Type a name for the new docking setting in the Name text box.
  5. Click OK.

    The Docking Manager dialog box appears with the new framework listed.

  6. Click the name of the docking setting you just created.
  7. Click the Add Dockable Object button Add Dockable Objects.

    The Select Toolbars & Windows dialog box appears.
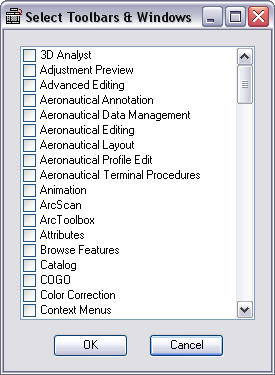
    Select Toolbars & Windows dialog box
  8. Check the check boxes next to the components you want to include in the docking setting.
  9. Click OK.

    The Docking Manager dialog box appears. The items you chose are now in the Toolbars and Windows list.

  10. Click to choose one of the objects.
  11. Choose a docking option:

    • Dock Left—Docks the item on the left side of the ArcMap window or to the left of another toolbar in a group
    • Dock Right—Docks the item on the right side of the ArcMap window or to the right of another toolbar in a group
    • Dock Top—Docks the item at the top of the ArcMap window
    • Dock Bottom—Docks the item at the bottom of the ArcMap window
    • Float—Leaves the item undocked

  12. Repeat steps 10 and 11 for each object in the list.
  13. Click OK.

    Note:

    You can view your new settings after you have created them by clicking Apply.

    Tip:
    If the Hide All Other Toolbars check box is checked, only the toolbars listed for your docking setting are shown. All other toolbars are removed from ArcMap. This property only applies to the toolbars; windows are not automatically hidden.

Related topics

  • Adding objects to a docking setting
  • Changing the order of objects
  • Removing objects from docking settings
  • Renaming a docking setting
  • Loading a docking setting
  • Exporting a docking setting

ArcGIS for Desktop

  • Home
  • Documentation
  • Pricing
  • Support

ArcGIS Platform

  • ArcGIS Online
  • ArcGIS for Desktop
  • ArcGIS for Server
  • ArcGIS for Developers
  • ArcGIS Solutions
  • ArcGIS Marketplace

About Esri

  • About Us
  • Careers
  • Insiders Blog
  • User Conference
  • Developer Summit
Esri
Tell us what you think.
© Copyright 2016 Environmental Systems Research Institute, Inc. | Privacy | Legal